Showing posts with label medicinal/household. Show all posts

Monday, February 27, 2012

apple cider vinegar-so easy even a hillbilly can do it

vinegar
mother

Today I finally strained off our apple cider vinegar that I made after we made jam and sauce from the apples last fall. It looks lovely and we got a bit over five gallons of healthy for you, raw, unpasteurized, product.

To make all that is needed is a container of some sort to hold the peelings, water and a piece of cheese cloth. After peeling and coring your apples set them out to get air for a day or two to brown and then toss them into your container. Add water enough to cover all peels but leave enough room that the vessel does not overflow. I like to weigh the peelings down so that they remain under water. Cover with a piece of cheesecloth to keep bugs and junk from entering and sit in a cool dark place. Let ferment.

The mixture will get a funky covering over it which is a whitish gray mass, this is the mother so leave her be. You will smell vinegar as the process occurs and after 4-6 weeks you can taste test it and see if it is strong enough for your liking. I let mine go 12 weeks with this batch and it is quite strong. When it is to your liking strain and bottle. It will likely be cloudy and sediment will drop to the bottom. This is fine, however, if it is bothersome, strain it through a coffee filter to remove the majority of it.

Thursday, February 23, 2012

the plant pharmacy


Though we live in an area with abundant medicinal plants in the wild, I do not trust myself with identification of most of them and do not have the means or time to toodle about the countryside in search of them. I would also rather have them here on the property rather than have to go and hunt them down as I am rather lazy like that. Besides that, many of the herbs have beautiful flowers that attract hummingbirds and other healthy critters that we would like more of. So, a couple weeks ago I went on a herb shopping spree and got us a slew of new herbs and plants for medicinal use and a few off the wall edibles that should do well here.

Thursday, October 21, 2010

medinal herbs-echinacea


Echinacea was a traditional remedy of the Native American Indians in the Great Plains, where it grows wild. The Cheyenne, Comanche, and other tribes used it for many ailments, including toothaches, sore throats, tonsillitis, coughs, and blood and lymphatic diseases. This herb can shorten the severity and duration of many common illnesses.

Echinacea is a flowering plant in the daisy family. The nine species it contains are commonly called purple coneflowers. Three species of echinacea are commonly used for medicinal purposes: Echinacea angustifolia, Echinacea pallida, and Echinacea purpurea. Other common names for Echinacea are Sampson root, Missouri snakeroot, and rudbeckia.  They are native to eastern and central North America, where they are found growing in moist to dry prairies and open wooded areas. They are a very easy to grow perennial plant that tolerates poor soil and drought quite well.
 
Echinacea is full of vitamins and minerals (copper, iron, iodine, potassium, and vitamins A, C, and E), along with flavonoids, oils, polysaccharides, phenols, and alkylamides. Because of this combination of ingredients, echinacea works as a natural antibiotic, which can suppress virus activity and promote immune system stimulation through the activation of the immune system’s natural bacteria killers.
Echinacea is used in tincture form for respiratory problems, bronchitis, sore throat, enlarged prostate gland, urinary tract infections, yeast infections, ear infections, sinusitis, and hay fever. Used externally it can help heal eczema, psoriasis, and slow-healing wounds. A tea can be made and used to maintain the body's resistance to infection, to mend injured tissue, and to promote healthy body functioning.

All parts of echinacea can be used but the root of 2-3 year old plants has the most healing properties. Echinacea roots are pretty stable after washing and may be cold-stored or shipped over a period of several days without molding. However, it makes sense to make the fresh root tincture as soon as possible after washing, which will minimize oxidation. 1 dropper full  3-5 times a day is the adult dosage in tincture form. Children can take echinacea tincture as well but in smaller doses. To comfort a sore throat; Mix 2 droppers of Echinacea tincture in 1/2 cup warm water. Gargle with it two or three times daily.  To make a children's tonic; Mix 1/2 dropper of tincture with grape or cranberry juice to improve the taste and provide some nutrients. Another nice tincture is made by grinding 2 oz. root in a coffee grinder and place in a quart jar. Then, add 1 handful grated ginger root, 3-4 orange slices, and 1 handful freshly-chopped or dried peppermint. Cover with 3 times more brandy or vodka than dry ingredients. Cover the jar with plastic wrap then screw the lid on tightly. Shake the jar daily for two-four weeks. Strain and decant. Take 1/4 to 1/2 tsp. or 1 dropper full 2 or 3 times daily until your symptoms have been gone for a few days. To make a feel-good echinacea tea; Mix 4 TB each of ground echinacea root, grated ginger root, and fennel in a non-metal 1 quart pot. Then add 1 TB of licorice root and 1TB orange peel or slices and 1 quart of water. Cover and simmer 20 minutes. Strain and drink as needed. The extra ingredients make this tea taste good plus they have the added effects of ginger which is an expectorant, licorice that  soothes your throat, fennel that  moistens your throat and lungs and helps to settle your stomach as well as the citrus which  is antiseptic, antibacterial, and rich in bioflavonoids.

In spite of some claims that Echinacea has no side effects, studies show that some people may experience allergic reactions, dizziness, drowsiness, headache, muscle aches, nausea, sore throat, temporary numbness of the tongue and upset stomach.  People with tuberculosis, leukemia, diabetes, connective tissue disorders, multiple sclerosis, HIV or AIDS, any autoimmune diseases, or liver disorders should not take echinacea. There is concern that echinacea may reduce the effectiveness of medications that suppress the immune system.

Friday, October 1, 2010

medicinal herbs- wild dagga


Leonotis leonurus, also known as Lion's Tail or Wild Dagga Is a member of the mint family of plants.  It is grown as an annual and can grow as tall as fifteen feet in one season. The leaves resemble a mint plant and the entire plant has quite a lovely smell to it. The stems are wood like and thick and the smaller branches coming off the main stalk are almost a square shape. The flower heads are covered in prickly spikes while the petals are brilliant orange and are resemble a lion’s mane.

 All parts of wild dagga can be used medicinally. Extracts and tinctures can be used for relieving coughs, colds and flu symptoms, fever reduction, bronchitis, tuberculosis, hepatitis, jaundice, regulating the menstrual cycle, headaches, and for lowering blood pressure. The leaf and root of the plant can be  dried and  made into  a decoction and applied externally to treat a variety of disorders. This remedy is often used in the treatment of eczema, itching skin, insect bites and stings, rashes, hemorrhoids, and boils. It is also used for treating muscle and joint pain associated with arthritis. In many countries it is also used as a snake bite remedy both internally and externally.When the stems and stalks are added to a bath, they alleviate itching and muscular cramps.

 In African countries, wild dagga leaves are commonly made into a medicinal tea, which is favored for the hypnotic focus it gives . The petals of the flowers can  also be dried and smoked supposedly for a mild opium type effect and the  leaves are commonly smoked as a tobacco substitute. Believe me it tastes terrible, if it was all I had to smoke, I would in a hurry become a non smoker. The flower petals are supposed to be the most potent part for  smoking but  from my own experience, the “buzz” from it only lasts a few minutes and it tends to upset the stomach so it kind of off sets any euphoric effects it may have. I thus far have not tried to make a tea to drink, as it is said to have a purgative effect and I   just do not feel like testing it out to see for myself. I personally prefer to use it   as a decoction or poultice for skin ailments than trying to actually ingest the stuff. I  have not been sick in so long that I can't say how  well a tincture works either, but I have it sitting in a cupboard just in case.

While there are no known side effects from using wild dagga it should be avoided while pregnant or nursing. Just like every other plant or weed used medicinally, use caution until you know you are not going to react to it.  This plant is perfectly legal to grow in all 50 states so there are no worries  about the legalities of growing it, although, to purchase from anywhere one must be 18. 

I  wonder how well it would work in a  potpourri or a air freshener type bag?

Wednesday, September 15, 2010

wild edibles-sassafras


Sassafras is one of my favorite wild edibles. Even though one doesn't generally eat it,it has many uses around the homestead  as a food/drink, medicinal purposes and as a natural dye(yellowish), so I classify it as  an edible.

First and foremost, the FDA has classified sassafras as a carcinogenic, so don't go eating 50 pounds of it in a session or you might get ill. I personally go by the rule, all things in moderation. I know many "foods" that are a carcinogen and they allow the use of them . I will not hop on my soap box but,  will allow each as an individual to decide for his/her self.

Sassafras is one of the easiest to identify plants/ trees  out in the wild. The leaves make it very easy to pick out as they often times look like mittens and they do not have just one shape of the leaves. One tree can have several  leaf shapes on it.

My favorite uses for sassafras are for making teas and in  making soda. Tea is made by steeping  the bark,  leaves or root of the tree  in water. In England, the tea is mixed with milk and sugar to make saloop, a morning beverage. I prefer it with just a touch of honey. To  make soda or traditional style root beer, make a simple  syrup and follow the directions for soda making.
Simple syrup
2 cups of broken-up sassafras twigs or root
 2 1/2 cups water
  2 1/2 cups sugar
 1  teaspoons citric acid or lemon juice
 Peel some of the green bark away from the twigs. The bark has most of the flavor.  Cover the twigs with the water and bring to a boil. Turn off the heat, cover and let steep overnight. Strain the sassafras tea through a strainer to remove any debris and measure it. You should still have 2 1/2 cups. Add as much sugar as you have tea, stir it to combine and bring it to a boil. Turn off the heat and let it cool. Add the citric acid, 1/2 teaspoon at a time
Store syrup in the fridge in a closed jar.  Keeps for up to a year.

Another great use for sassafras is as a thickener in soups, stews and gumbo.  Gumbo would not be traditional gumbo without using file. To make, simply dry the leaves of the sassafras and crush or grind. Add it to your recipe as the thickening agent rather than a flour or corn starch thickener.

Medicinally, sassafras is said to have value as a stimulant, pain reliever, astringent and treatment for rheumatism. Skin problems may be bathed in an infusion from the leaves. . It is said that chewing on the bark may help break the tobacco habit, however, the  FDA says it isn't good for you and well... you know. I have known a few folks that have used the twig chewing to aid them in breaking the nicotine  habit and they have not died from cancer.

Here is another recipe that I have not tried, but thought I would include it since  it sounds good. I am going to make my own version of it here on the homestead soon, replacing  what I have on hand  for what I do not have in the recipe.

Sassafras peanut sauce
2 tbs. peanut oil
2 red onions, chopped
3 large cloves of garlic, chopped
1 cup toasted peanuts, finely chopped
1 cup coconut milk
1/2 cup water
3 tbs. lime juice
1/2 tsp. sassafras root bark (cambium) or cinnamon, ground
1/2 tsp. salt
1/4 tsp. liquid stevia
Saute the onions and garlic in the peanut oil 10 minutes. Add the remaining ingredients, bring to a boil, reduce the heat to low, and simmer 10 minutes.
Puree in a blender or food processor if you prefer a smoother sauce.Serve hot or at room temperature. You can cook vegetables or tofu in this sauce. Serve over rice or pasta.

Here is another link that has some jellies, mead and candies  using sassafras.   http://www.southernangel.com/food/sassafras.html


Wednesday, May 26, 2010

oregon grapes- making juice

Here on the homestead we have an Oregon grape bush/tree thing. For the first time I harvested them for our personal use. To be honest, I had no idea they were even edible until a couple years ago. In fact, few people know that they are edible because of their holly like appearance.

Most American herbalists rank the Oregon grape as one among the most outstanding and exceptional Native American herbs available today. They also believe that the shrub is in fact one of the best herbs available today, which can effectively stimulate liver activity and the secretion of bile. There are several reasons for this belief. For one, the Oregon grape boasts of a bright yellow root, which is high in the alkaloid berberine, which is in turn an important constituent of other similarly powerful healing plants like for example, goldenseal. The root is also said to have a warm and drying influence. The Oregon grape can stimulate weakened livers, and at the same time dramatically alleviate liver-induced symptoms such as headaches, poor digestion, and toxic blood... Herbalists of today prefer to use the Oregon grape to cleanse the liver, the spleen and in some cases the blood too. However, an individual who consumes too much rich food, or who overeats regularly and who therefore has an overactive liver must not use Oregon grape, because of its action on the liver.

Oregon grape is generally prepared in an easy infusion, using 1/2 ounce of dried Oregon grape root to one quart of water. The infusion can usually be taken a cup at a time, thrice a day until relief is obtained. Oregon grape is often used in herbal formulas, too. Since the berries of the Oregon grape have been found to possess a cooling effect, they are used to break fevers. For more information on medicinal uses click here.
 The Oregon grape  is quite a sour little berry so you don't really want to eat a handful of them unless you happen to have scurvy as the berries have a  lot of vitamin c in them.  They also have from 1 to 4 seeds in each tiny "grape"   so there isn't much meat to them. The good thing is that when prepared they make a fair replacement in all grape recipes from jams and jellies to wine, and juice.

Yesterday I picked our "grapes" from the bush. Because it is so holly like, the leaves on the plant will prick you  and may also cause a slight allergic reaction when bare skin rubs on the plants.  Wear gloves and long sleeves. Once the  ripe berries are picked wash and remove stems, bugs and any non ripe berries.The berries  also have a dusty blue coating on them,when you pick them it sort of rubs off and they become a purple/blue color.

To make the juice I simply put 2-3 cups of grapes  in  sterilized jars, add a cup of sugar and fill  with hot water. Next cap and process in a hot water bath for 20 minutes. Allow the juice to age for two months or more. When ready to use, reconstitute and add sugar according to your taste.

I processed twelve quarts of juice yesterday from one plant, not bad for something  we didn't know was edible. This fall I will likely sacrifice one of the roots for medicinal uses.

Sunday, May 16, 2010

rose petal jam

A couple days ago one of the blogs I like to follow made a post on rose petal jam. Having just come inside from taking pictures of the roses I decided that rather than let them go to waste on the bush I was going to make me some jam.

This morning since we had the fire built up good for some cooking I decided to make it. I followed the recipe  from here and it turned out quite lovely looking. Now if it doesn't taste like a giant bottle of perfume we are all set. 

Saturday, April 17, 2010

dandelion syrup

The other day I made dandelion syrup. Much to my surprise it is  quite  lovely and I think it will make a very suitable honey type replacement as well as pancake syrup. It is very sweet yet has an earthy, clover honey type flavoring to it.  We had an abundance of dandelions this year so I have made a half gallon of syrup with enough   to make  more if it is something I find we  are using enough of  to warrant more.

Dandelion syrup
Take one quart of dandelion flowers and four cups of water and boil gently for about an hour. Remove from heat, cover and let sit overnight. The following day strain and squeeze liquid out of flowers and throw the flowers to compost. Put the liquid back in the pan and add 1/2 of a chopped lemon and 2 cups  of sugar. Simmer until a thick honey like consistency.  Cool and place in tightly closed jars. Store in fridge.

Sunday, April 4, 2010

wild edibles-dandelion

The lowly dandelion is  another one of our favorite early spring time additions to meals. Much like the violets more often than not I add  very young tender greens, buds and flowers to salads.When we have greens dishes I often add the young greens to our harvest  from the gardens. Our newest dandelion dish is poppers or deep fried dandelion flowers.

Tonight I made us some Buffalo wing style poppers and boy were they good. To make them simply cut fresh, just opened dandelion flowers as close to the flower head as you can. The stems have milky sourness in them so be sure to cut as much  off as possible but not so much that the flower falls apart. Rinse well and strain.  Dip in your favorite deep fry batter and deep fry. For the Buffalo  wing sauce I use  tobasco , mix in a dab of butter and touch of salt and coat the  poppers  well and place in 350 degree oven for 10 minutes . Serve hot with ranch or bleu cheese dressing.  For a more dessert like popper try coating the cooked  flowers with cinnamon and sugar.

My next foray with the dandelion is going to be  making a coffee  replacement. To make  "coffee"  dig the roots up wash, wash  and wash again.  chop fine in a food processor and bake  at 225 for a few hours. The dandelion root  will go from a light beige color to a rich coffee like color when done. Cool the dandelion grounds and store in air tight container.Start with a blend of 1 tbsp grounds per cup of drink, adjust to your liking.

I enjoy making vinegars with dandelions as well as vinaigrette. I find it a good way to get some of the  health benefits of the dandelion all year long. Dandelion helps both the liver and gall bladder to break down fat, by stimulating the flow of bile thus helping to  prevent gallstones. Dandelion also helps the liver with its process of detoxification as well as  benefiting kidney function,( as it has diuretic properties,  which makes it beneficial for anyone suffering from a urinary infection).  Dandelions also contain  potassium, magnesium, niacin, calcium, phosphorus, proteins, iron, sulphur, zinc, vitamins B1, B2, B6, B12, C and E. They are also  a richer source of provitamin A (beta carotene) than carrots. Because the leaves are rich in readily available magnesium, dandelion is also a great herb for improving bone health. Magnesium increases bone density, so dandelions may actually help to prevent bone disorders such as osteoporosis.

Medicinally dandelions can be used  as a liver tonic and as a mild diuretic. The roots may be dug in fall or early spring and tinctured. A dropperful of this alcohol extract twice a day is a time-honored remedy for liver complaints. The milk from Dandelion stems can cure warts. It should be applied three times each day. Teas can also be made from the leaves and flowers and drank for liver and gall bladder  cleansing. I personally do not  care for the tea much  but for medicinal use, it is not something I would like to drink a cup or two of every day.The milk from Dandelion stems can cure warts. It should be applied three times each day. Dandelions are currently being studied for control of blood sugar because of the inulin contained within them.

There are many more things that dandelions can be used in both culinary and medicinally. For some really nice and different recipes from cakes, to cornbread, pancakes and wine amongst others check out
http://www.prodigalgardens.info/dandelion%20recipes.htm


Saturday, April 3, 2010

wild edibles- violets


                                                      (not a good example plant lol)

Spring is a wonderful time for finding wild edibles on the homestead . One of the first available for harvest  here are  violets and they are also one of our favorites. Luckily for us they  grow natural  and are very prolific.

There are over 900 species of violets in the world so exact identification is difficult but most all the varieties have the same edible and medicinal uses. All species  have 5 petals, which may have a yellow fur on the inside of two of the petals.Violets bloom  from March to June. Gather the  flowers when in full bloom, leaves anytime, although the younger leaves are more tender, and rootstock in fall. Roots, leaves and flowers can all  be dried  for later use.Violet leaves are high in vitamin c and several other nutrients.The flowers have a sweet mild aroma

The most common use for violets is using the flowers and leaves in salads and garnishes.  We eat them this way  nearly every day as long as they are in season. They make a pretty garnish in soups and on desserts too.The flowers can also be candied but in my experience although they taste great, getting them to look even half way good is difficult. For food purposes the flowers and leaves can also be jellied. I have not tried this recipe as yet but  since we have such an abundant crop of them this year, I just may as it  certainly looks good.  For a few more  interesting violet recipes check out
http://www.prodigalgardens.info/violet%20recipes.htm#Spring%20Salad

The flowers and leaves of violet are made into a syrup used in alternative medicine mainly for respiratory ailments associated with congestion, coughing, and sore throat.There are even a couple brands of this sold on the market. Following is the recipe I have on hand to eventually try out. We rarely get sick so I see no point in having too many herbal remedies in them medicine chest at once. Pour 1 pint of boiling water over 1 cup packed fresh crushed flowers and leaves. Cover and let stand for 12 hours. Strain and squeeze through cloth, add 2 lb. of sugar and boil for 1 hour or until syrupy. Store in glass jar. Give 1 tbs.(1 tsp. for children)  2 or 3 times a day.
Tea made from the entire plant is used to treat digestive disorders and "new research has detected the presence of a glycoside of salicylic acid (natural aspirin) which substantiates its use for centuries as a medicinal remedy for headache, body pains and as a sedative. The plants constituents are being studied and show these uses to be valid. Eugenol, Ferulic-acid, Kaempferol, Quercetin, Scopoletin, also show promise in the treatment of many kinds of cancer, arthritis, AIDS, gum disease and more."  
Teas for digestive issues can be made by taking  ¼ cup dried or fresh herb in 1 cup of water for  and steep for 10 minutes. Strain, flavor to taste. Take in ½ cup doses twice a day.  Used externally the fresh crushed leaves reduce swelling and soothe irritations. As a bath additive the fresh crushed flowers are soothing to the skin and the aroma is very relaxing.


Wednesday, March 3, 2010

I am so cheap-crystallized ginger

We have  been making our own lacto fermented soda here for a little while now and one thing I have noticed is that we have a lot of ginger bits that seem to be perfectly good yet  getting  thrown away.  We make our starter here using ginger  but after a few batches of soda, the ginger " feeder bits" need to be strained. I had been throwing them away   but after tasting a bite of a piece realized that the ginger was not only still crunchy  but had a lot of flavor in it yet. The only  apparent difference to me   was a slightly alcohol flavor to the pieces of ginger. 

As I fished through the fridge for my fresh ginger root to refresh my  starter culture I had to move a jar of mango and ginger marmalade a friend has sent me from Australia. It was then that it hit me what I needed to do with the ginger, crystallize it. There was absolutely no reason why I couldn't take the strained bit and make our very own crystallized ginger at a fraction of the cost of what it is to buy it, know what was in it, be recycling  in the process and making another of our own natural  healing agents in the process.

Ginger is a wonderful herb for many different ailments. Some of gingers' therapeutic actions  are anti-nausea, stimulant, circulatory stimulant, vasodilator (opens up blood vessels to improve blood flow), anti-spasmodic, anti-inflammatory, rubefacient (warms tissue externally) and diaphoretic (stimulates perspiration to increase elimination through the skin and can help reduce fevers).  It can also help to lower cholesterol levels and reduces the risk of heart disease and stroke.  It can assist to lower blood pressure & helps stop coughing.  For many of these therapies  ginger is drank in a tea form or by eating crystallized ginger pieces. Instead of using ginger for our  teas, I instead use the ginger pieces as a sweetener and simply throw a few pieces into  whatever flavor tea I am drinking as it steeps. The ginger pieces can also be used in various cooking dishes as well as desserts and other confections. It goes very well in many marmalades and is a wonderful accompaniment in some chutneys and served with meat. 

Making your own crystallized ginger is very easy. Cube or slice your fresh ginger root (Already done if you are being cheap like me and recycling it). Place ginger in sauce pan, cover  with water and 1 cup sugar. Bring to a boil and simmer for 30 minutes, reduce heat and continue boiling until water is nearly evaporated. Measure  the amount of cooked down ginger and add equal amount of sugar and 1/4 cup water. Bring back to boil and stir constantly. Lower heat and continue to stir until water is  evaporated and  ginger is near dry. Cool and coat in sugar. Store in airtight container  for up to 3 months, longer if it is  stored in fridge.


Sunday, February 7, 2010

nuts- more specifically acorns

One of our past times here on the homestead is foraging wild edibles and one of our favorites  is the lowly acorn. In the fall when we begin hearing them hit the tin roof we know it is time to dig the bags out  and go  to scooping them up.

Way back when, the Native Americans used acorns as a main staple food in their diet ( upwards of 50% of the food) and during the great depression they  had a resurgence in popularity, unfortunately in modern times we have again left them by the wayside.   A good stand of oaks can  produce upwards of 6000 pounds of nuts per acre. Rivaling any modern day  farming crop per acreage they can also  be used as fodder for domesticated animals as well as wild life and as a viable food crop  for us humans.

All Acorns are edible, but some are larger than others and contain less tannic acid so are much easier to process.  Oaks are divided into two main families; red oaks and white oaks.  Red oaks have pointed tips and white oaks have more rounded lobes on their leaves.  It’s the white oaks that have the biggest and the best Acorns with the least amount of tannin.

Acorns have  a high content of fats and carbohydrates, undesirable traits in today’s culture, but of paramount importance in primitive societies for sustenance.  100 grams of acorn flour (roughly one cup) contains  500 calories, 30 grams of fat, and 54 grams of carbohydrate.  They also rate pretty high for vitamins and minerals in a nutritional profile, truly a survival food of high degree. Acorns make a fine flour  for breads and other dishes or  they can be used as whole nuts. They can also be used in place of any nut in  recipes.  

The gathering of acorns here usually begins in  mid to late September. We normally will go out and pick  up the fresh fallen ones each day over the course of a week or so. Once collected I  throw them all in  a bucket of water and floaters are tossed to  the critters. If the acorns float  it means the shell has been  drilled into  by moth larva and are no longer good. I then drain them  and set  them out in trays in the sun to dry for several days and then store them until I need to use them. 

One processes acorns depending on the end use. If cold processed the starch is not cooked (why the recommendation to keep all temps under 150F) and the resulting meal or flour will bind, can be used for making bread and as a thickener in soups and stews. If they are heat processed, boiling for example, they then make a poor flour because the starch is precooked so it will make crumbly bread that will not stick together, and one has also boiled off the fat, which is an important nutrition and flavor element. However, after leach boiling, while acorns roast well and candy well.
Sun Drying: Place the tray of acorns in direct sunlight for two to five consecutive days, depending on how "green" your acorns are when you collect them. Bring all your acorns inside each night. Drying in the sun is the traditional method. If the sky is partly cloudy or overcast, then you may need to dry your acorns for more than five days in the sun. (Note: If your acorns are not completely dry, they will soon be covered with mold and you will have to throw them away. Any acorns that are still partially green after a few days of drying should be separated from the rest of the acorns. Continue drying any partially green acorns until they turn completely brown.)
The advantages of sun drying are:
1. It helps to kill insect larva, and
2. It helps to reduce future mold problems.

The disadvantages of sun drying are:
1. Flying insects will lay eggs in some of the acorns and they will have to be thrown away.
2. The inner nutmeat looses some of its moisture and flavor.
3. The shelf life of the nutmeat is between four to six months.

If you have windows facing the sun, then you can place your tray of acorns in the sun inside your house and eliminate the flying insect problem above.

Oven Drying: Place the tray of acorns in a warm oven (150ºF) for about 30 minutes with the oven door slightly cracked to let the moisture escape.
If acorns  are heated above 165F by any means before leaching, the tannin binds to now-cooked starch and cannot be leached out.

The advantages of oven drying are:
1. Drying can be done very quickly.
2. It effectively kills all insect larva.
3. It eliminates future mold problems.

The disadvantages of oven drying are:
1. The inner nutmeat looses most of its moisture and flavor and it becomes very hard to chew.
2. The shelf life of the nutmeat is only two or three months.

House Drying at Normal Room Temperatures: Allow the acorns to dry gradually inside your home at normal room temperatures. The acorns should only be one layer thick on the drying trays. If the acorns are relatively green, this drying method normally takes between two to four weeks.

The advantages of room temperature drying are:
1. The inner acorn nutmeat retains most of its original moisture which adds to its flavor and chewability.
2. If your home is free of flying insects, then you will not loose any more acorns to insect larva.

The disadvantages of room temperature drying are:
1. It can take as long as four weeks to properly dry the acorns.
2. Each day you will need MORE house space to dry additional acorns.
3. Periodically you will have to inspect your acorns for tiny worms.
4. Future acorn nutmeat mold problems are more likely to occur.
http://grandpappy.info/racorns.htm 

Do NOT remove your acorn nutmeats from their protective outer shell until you are ready to process and eat them.

About a week before  I want to use the acorns I begin shelling them. The best way to do this is with a plain old nut cracker or if they are larger nuts a lobster cracker will work. Then I break the nut meats up into smaller bits so that leaching does not take as long They will next need to be leached of the tannins. There are several ways of doing this and depending on the type of acorn the length of time for leaching varies. Some of the white varieties need little or even no leaching while red may require several  hours or even days.

The manner in which you leach  your nuts is entirely up to you and dependent upon  how  soon you need them..  The Native Americans would put them in a sacks tie it closed and toss the sack into a flowing stream or river  and allow the water flow to leach them  over the course of several days. I tried this at our spring head and after two weeks the nuts were still bitter. I have read some folks tie them in a bag and stick them in a toilet tank and let the water in there leach them. Since we use an out house that  is impossible for us.

I have also  tried the crock or pail method and changing the water out a couple times a day until the water runs clear. If you do not need your acorns for quite some time this is  a good method to use as you can save the tannic water from the acorns and use it in many different ways. The tannins can be used to tan  hides, as a hair rinse, as an additive to your laundry water (non whites), or even as an astringent as well as a few other medicinal uses.

The method I have found that works best is by using hot water after  doing  the  crock or bucket method. I  put my acorns in  a bowl or pot and heat water to steaming hot, but  not boiling. Then I pour the  water over the acorns, stir and sit for 5 -10minutes and then drain.  I  repeat this process until the nuts are no longer bitter  and the water runs clear.

Once this is done you    again let the nuts air dry, sun dry or oven dry  for storage. I generally store mine in the  larger pieces of nuts in a container in the freezer and then   use as needed from there. They will stay fine in the freezer for a couple of years with no trouble. I grind  the nuts into a flour as needed for recipes. For a decent coffee like substitute you can roast the  nuts or parch them  and  brew a coffee.

My favorite acorn dishes are any of those made with  winter squash. Acorn  acorn patties  are one of my favorite dishes. Breads and muffins using either nut meats or flour are very yummy.  Here are a few more that  I have found  over the last few years. Some I have tried and some I  have not.


Here are a few more recipes

Friday, February 5, 2010

sunflowers for food and oil

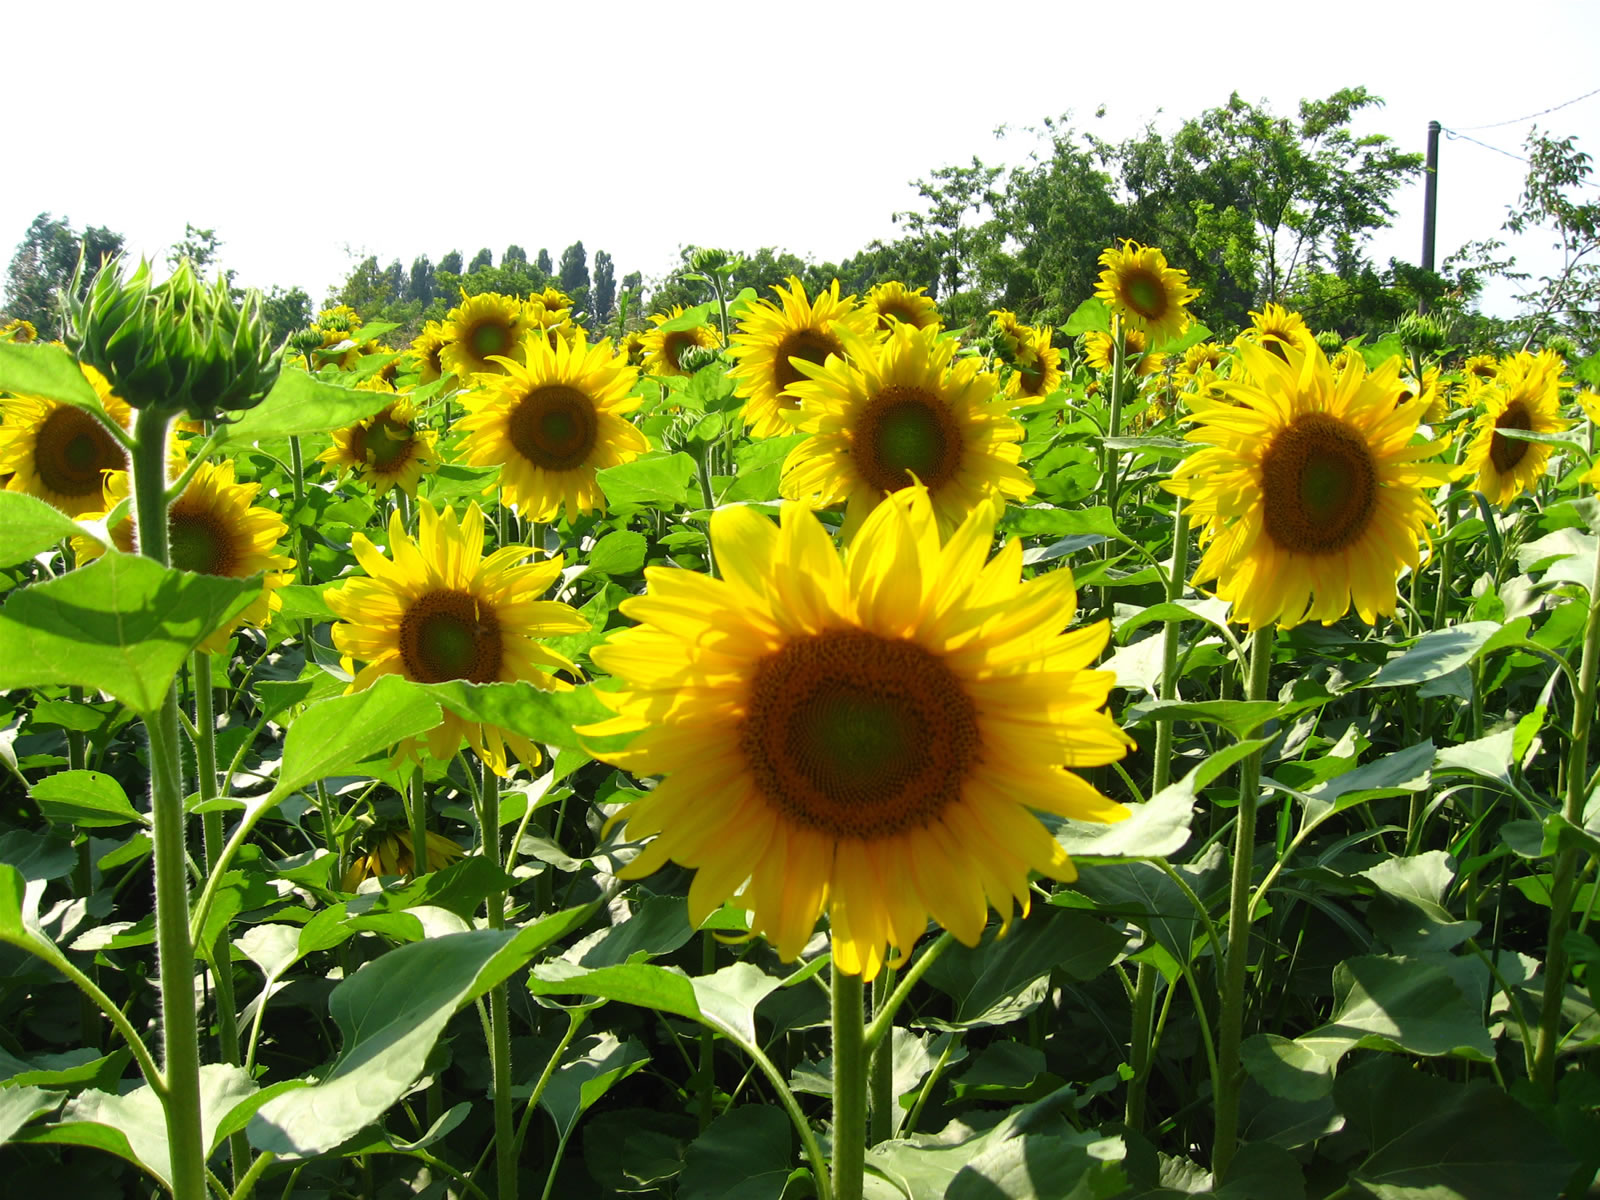
Sunflowers are some of the easiest plants to grow and have an assortment of uses around a homestead. Not only are they a nutritious and delicious snack but they can be hulled and used in salads, made into nut butter, fed to livestock, serve as bird feeders and made into oils. Sunflower seeds contain calcium and iron and have no cholesterol in them. The fats in sunflower seeds are mostly polyunsaturated linoleic acid.

Sunflowers are direct sown into the soil once all chances of frost have passed. Plants seeds 1/2 to 1 inch in the ground and watch them grow.The giant varieties do have a tendency to grow to height of 12- 14 feet which does make the seed heads susceptible to being windblown and knocked over. For the giant breeds i mound the soil at the base of the plant in an attempt to give them a sturdy foundation . Sunflowers have about a 90 or so day harvest time so they can grow in most any zone.

Sunflowers can begin being harvested when the back of the seed heads turn yellow or when the center flowers turn brown.Simply cut the heads off , leaving a piece of stem to hang them in a well ventilated place to finish drying. Cover them with netting, paper sacks with holes or cheesecloth to catch falling seeds as they dry.

They can be allowed to dry on the stalk, but you'll have to cover them this way to keep the birds from eating them all before you can harvest them for yourself. If you grow sunflowers for the purpose of feeding birds, you can either leave them in the ground, or harvest the heads as above, then hang them in the yard or garden when they are ready. This method has an advantage in that you can dole out the heads over the winter, instead of seeing the seed all eaten within a few weeks.


When the seeds fall easily from the head, they are dry and the seeds are ready for roasting. If you have a lot of plants to rub, wear some gloves  as it will
Remove the seeds and remove any debris from them.

From here what I do is take the seeds that are cleaned and soak them in a 1/4 cup salt to a quart of water solution for about 12 hours. Then I place them on a cookie sheet in a single layer and slow roast them in an oven set on the lowest setting until they are dry and ready for storage. This generally takes between 3 and four hours. Stir them a couple of times during the roasting process. If you intend to store them for any length of time, put them in jars while still warm and close tightly. They keep very well in a cool dark place. Some variations call for mixing a teaspoon of melted butter with a cup of seeds while they are still warm from the oven, (these are for immediate eating only ) or roasting them until they are browned instead of just dry.

To make nut butter 
Start with raw seeds, and shell them by putting them in a cloth bag or wrapping them in a cotton cloth, then pound (gently!) with the flat side of a hammer, or something similar. Don't smash them, just crush them. When they're mostly crushed, pour them into cold water and stir a time or two to let the loosened hulls rise to the top. Skim these off, and stir again, as many times as it takes. When nothing but sunflower kernels are left, (you may have to pick through them) pour off the water, and spread to dry.Put them in a food processor and let it do the work. ( you can use a blender.) More labor intensive, is to use a clean glass jar or bottle and crush the seeds against the bottom of a bowl. It takes more time, but connoisseurs claim that the butter tastes better when it's hand made. If the butter seems dry and clumpy, add a little oil, about a quarter teaspoon, at a time, until you get the right consistency. Keep mixing until the butter is as smooth as you want it. You can add salt or not, but salt will help it keep better. store it in the refrigerator.

 to make  sunflower oil
A number of oil seeds can be grown here are some:
Corn 129 lbs of oil/acre or 18 gal/acre
Soybean 335 lb of oil/acre or 48 gal/acre
Flax 359 lb of oil/acre or 51 gal/acre
pumpkin seed 401 lb of oil/acre or 57 gal/acre
sunflowers 714 lb of oil/acre or 102 gal/acre
peanuts 795 lb of oil/acre or 113 gal/acre

As you can see sunflowers  per acre produce more any other oil producing plant but for peanuts. For those in the northern  states or places with a short grow season peanuts are near impossible to grow. Sunflowers on the other hand  are a viable  option  for most everyone.

For a good tutorial on making a home made seed huller and   oil press for  the sunflowers, I refer you to  Rodale's press. An article from 1979  explains the easiest methods of making both and for a  reasonable price, if not  at no cost.

Friday, January 8, 2010

simple soap in a crock pot

This is the simplest home made soap recipe there is. Not only are the ingredients simple and easy to find but by doing it in a crock pot it makes it so easy even a hillbilly can do it . This is a really good recipe for someone that is a beginner.

You can use any recipe you wish for the crock pot soap however for simplicity sake I used this recipe
48 oz of oil(veg, olive, lard, shortening, coconut, palm,or any mixture of them)
6 oz lye
14 oz water


I will add tea tree oil for scent and no other additives since I generally use my home made soap as an all purpose soap for dishes, hands, body and hair.It can also be used in laundry as it is a castile soap.

Thursday, December 31, 2009

home made all purpose cleaners

Many like to start the new year off with a nice clean house and many have goals or resolutions to begin using more earth / people/home friendly cleaners in the household . So, in honor of the resolvers and cleaners....

Here are several all purpose home made cleaners. Try one or all and see which one you like the best. All work as good or better than anything you can buy commercially and are much better for you health wise than the chemical laden, toxic products on the market. If you are an allergy or asthma suffers one of the first things you should do is eliminate the chemical based cleaners from your home.

You can also save money by mixing up your own cleaning solutions, these products can all be made for literally pennies rather than several dollars. for those that like to have a stock pile or prep, it takes much less space to store the ingredients to make hundred of gallon of home made cleaner than it does to store all the pre-made products.

Non-Toxic All Purpose Cleaner
1/2 water or colloidal silver
1/2 vinegar
4 tablespoons lemon juice
10-20 drops tea tree oil
spray bottle
Combine all ingredients in a plastic spray bottle. Has a tea tree/vinegar smell. (If you don't like the smell of tea tree oil, try lavender or citrus.) Shake your to mix. Use this all purpose cleaner anywhere as needed. Non-toxic and organic so it is safe for daily use on door knobs and toilet handles, switch plate covers etc.

Amazing All Purpose Cleaner
1 teaspoon borax
2 tablespoons vinegar or lemon juice
1/2 teaspoon washing soda
1/2 teaspoon vegetable-based detergent (castile soap)
2 cups very hot water
Combine all ingredients in a plastic spray bottle.Shake your new homemade all purpose cleaner to mix. Use anywhere as needed. Strong enough to wipe out germs and viruses. Use daily on door knobs and toilet handles, especially when a family member is sick.

all purpose cleaner
3 tbsp. vinegar
1/2 tsp. washing soda
1/2 tsp. vegetable oil based liquid soap (castile)
2 cups hot water
Mix ingredients in spray bottle or bucket. Apply and wipe clean.

Homemade Spray Cleaner Recipe

1 cup white vinegar
1 cup water
Mix in a sprayer bottle

In the kitchen, use vinegar-and-water spray to clean counter tops, lightly soiled range surfaces and back splash areas. Works great on stainless steel surfaces, no streaks.

In the bathroom, use vinegar spray cleaner to clean counter tops, floors, and exterior surfaces of the toilet.For really tough bathroom surfaces such as shower walls, pump up the cleaning power by removing the sprayer element and heating the solution in the microwave until barely hot. Spray shower walls with the warmed generously, allow to stand for 10 to 15 minutes, then scrub and rinse. The heat helps soften stubborn soap scum and loosens hard water deposits.

Baking Soda. Dissolve 4 tablespoons baking soda in 1 quart warm water for a general cleaner. Or use baking soda on a damp sponge. Baking soda will clean and deodorize all kitchen and bathroom surfaces.

all-Purpose Cleaner:
1/2 cup vinegar
1/4 cup baking soda (or 2 teaspoons borax)
1/2 gallon water.
mix. Store and keep. Use for removal of water deposit stains on shower stall panels, bathroom chrome fixtures, windows, bathroom mirrors, etc.

Wednesday, December 30, 2009

home made laundry soaps

There are a zillion or so versions of home made laundry detergents and soaps. Some recipes are not completely home made but instead are "watered down" versions of a commercially available variety. This method works well for those that have to sneak in frugal ways because folks you live with "need" the store bought versions.

For this method all you do is buy your box of powder and and then “dilute” it with baking soda and borax! use about 1/4 cup per load.

for all the other methods there are keep in mind the following..

Home made soaps will NOT suds like store bought soaps will. The suds are not the cleaners, they just make things look cool and we believe it is the suds doing the cleaning

Fels naptha, zote and other castile soaps are the best choice when mixing bar soaps

Try to use the non scented and non colored bars of soap is you must use something besides the above mentioned soaps

These recipes are generally gentle enough for baby and people with skin trouble.

super washing soda can be made by baking regular food grade baking soda at 400 for 20 minutes.

Borax is often known as borateem or 20 mule and is normally in most large stores.

Those with very hard water may have to adjust the recipes to have these work well for you

for the liquid soaps a five gallon pail with a lid is the best storage container. The powder recipes are generally a bit smaller so any air tight container will suit for storage.


keep in mind there are even more frugal ways of cleaning laundry, just look to mother nature and the world around you Tannin makes a wonderful "soap "on everything but whites. Saponins also make excellent very frugal cleaners.

If you need a smell to your soaps or detergent add a few drops of essential oils or you can find fragrances in craft stores.

Recipe 1
1 quart Water (boiling)
2 cups Bar soap (grated)
2 cups Borax
2 cups Washing Soda
Add finely grated bar soap to the boiling water and stir until soap is melted. You can keep on low heat until soap is melted. Pour the soap water into a large, clean pail and add the Borax and Washing Soda. Stir well until all is dissolved.Add 2 gallons of water, stir until well mixed.Cover pail and use 1/4 cup for each load of laundry. Stir the soap each time you use it (will gel).

Recipe 2
Hot water
1/2 cup Washing Soda
1/2 cup Borax
1/3 bar Soap (grated)
In a large pot, heat 3 pints of water. Add the grated bar soap and stir until melted. Then add the washing soda and borax. Stir until powder is dissolved, then remove from heat. In a 2 gallon clean pail, pour 1 quart of hot water and add the heated soap mixture. Top pail with cold water and stir well. * Use 1/2 cup per load, stirring soap before each use (will gel).

Powdered Laundry Detergent – Recipe 3
1 cup Washing Soda
1 cup Borax
Mix well and store in an airtight plastic container. Use 2 tablespoons per full load.

Recipe 4
Hot water
1 bar (4.5 oz) Ivory Soap – grated
1 cup Washing Soda
In a large saucepan add grated soap and enough hot water to cover. Heat over medium-low heat and stir until soap is melted. Fill a large pail with 2.5 gallons of hot water, add hot soap mixture. Stir until well mixed. Then add the washing soda, again stirring until well mixed. Set aside to cool. Use 1/2 cup per full load, stirring well before each use (will gel)

Recipe 5
2.5 gallons Water (hot)
1 Bar soap (grated)
3/4 cup Washing Soda
3/4 cup Borax
2 TBS Glycerin
Melt bar soap over medium-low heat topped with water, stir until soap is melted. In a large pail, pour 2.5 gallons of hot water, add melted soap mixture, washing soda, borax and glycerin. Mix well. Use 1/2 cup per full load.

Recipe 6
2 cups Bar soap (grated)
2 cups Washing Soda
2 – 2.5 gallons hot water
Melt grated soap in saucepan with water to cover. Heat over medium-low heat and stir until soap is dissolved.Pour hot water in large pail, add hot soap and washing soda. Stir very well. Use 1 cup per full load.

Recipe 7
2 gallons Water (hot)
1 bar Soap (grated)
2 cups Baking soda
Melt grated soap in a saucepan with enough hot water to cover. Cook on medium-low heat, stirring frequently until soap is melted. In a large pail, pour 2 gallons hot water. Add melted soap, stir well. Then add the baking soda, stir well again. Use 1/2 cup per full load, 1 cup per very soiled load.

Powdered Laundry Detergent – Recipe 8
8 cups Baking Soda
8 cups Washing Soda
8 cups Bar soap (grated)
Mix all ingredients well and store in a sealed tub. Use 1/8 cup of powder per full load.

Powdered Laundry Detergent Recipe 9
1cup Vinegar (white)
1 cup Baking Soda
1 cup Washing Soda
1/4 cup liquid castile soap
pour the liquid soap into the bowl first, stir in the washing soda, then baking soda, then added the vinegar in small batches at a time (the recipe foams up at first). The mixture is a thick paste at first that will break down into a heavy powdered detergent, just keep stirring. There may be some hard lumps, try to break them down when stirring (it really helps to make sure the baking soda isn’t clumpy when first adding). I used 1/2 cup per full load with great results. Mix well and store in sealed container.

Tuesday, November 24, 2009

herbal vinegars for good health


I was going to spend the time making this post but instead I found this in my stash of book marked sites. It does a much better job of explaining than I could ever do . Here is a snip from an article on the subject..

herbs to use in vinegars
  • Apple mint leaves, stalks
  • Bee balm (Monarda didyma) flowers, leaves, stalks
  • Bergamot (Monarda sp.) flowers, leaves, stalks
  • Burdock (Arctium lappa) roots
  • · Catnip (Nepeta cataria) leaves, stalks
  • · Chicory (Cichorium intybus) leaves, roots
  • · Chives and especially chive blossoms
  • · Dandelion (Traxacum off.) flower buds, leaves, roots
  • · Dill (Anethum graveolens) herb, seeds
  • · Fennel (Foeniculum vulgare) herb, seeds
  • · Garlic (Allium sativum)
  • · Garlic mustard (Alliaria officinalis)
  • · Goldenrod (Solidago sp.) flowers
  • · Ginger (Zingiber off.) and Wild ginger (Asarum canadensis) roots
  • · Lavender (Lavendula sp.) flowers, leaves
  • · Mugwort (Artemisia vulgaris) new growth leaves and roots
  • · Orange mint leaves, stalks
  • · Orange peel, organic only
  • · Peppermint (Mentha piperata and etc.) leaves, stalks
  • · Perilla (Shiso) leaves, stalks
  • · Rosemary (Rosmarinus off.) leaves, stalks
  • · Spearmint (Mentha spicata) leaves, stalks
  • · Thyme (Thymus sp.) leaves, stalks
  • · White pine (Pinus strobus) needles
  • · Yarrow (Achilllea millifolium) flowers and leaves
  • Burdock root
  • Yellow Dock root
  • dandelion (flowers, buds, leaves, and roots)
  • Comfrey
  • Garlic Mustard
  • Chickweed
  • Red Clover
  • Lambsquarter
  • Nettles
  • Red Raspberry Leaves
how to make your own herbal vinegars

A very good article written by one of my favorite net folks, Susun Weed. She also has a very good you tube series that you may want to check out

a few recipes using your herbal vinegars

Monday, November 23, 2009

Culinary Herbs as medicinals


and since we are still on the subject of herbs...

Think of your spice rack as your medicine chest. most culinary herbs actually began as medicinal herbs. Through thousands of years of dietary changes we have lost the art of eating our medicines

Now, during these times of chemicals, preservatives, GMO's, homogenization irradiation and ever growing health care costs it is time to get back to basics and back to using some of our most common herbs in treating some of our ailments..

If you are pregnant or have a serious medical condition, always consult a professional before ingesting significant quantities of herbs


Basil (leaf, flower) is cooling and belongs to the mint family. It aids digestion, supports the stomach and is a slight sedative. (tea 4-6oz., tincture 10-15 drops)

Bay (leaf) is astringent, anti-bacterial and anti-fungal. It supports the nervous system and stomach, helps dispel gas. It stimulates menstrual flow. (tea 2-4 oz., tincture 10 drops)

Black pepper (seed) is stimulating, increases flow of gastric enzymes, and helps prevent constipation. (tea 2oz.)

Cayenne as you know is very heating. Cayenne strengthens the heart, capillaries, arteries and nerves. Good for cold feet and hands. It also stimulates stomach secretions and opens the bronchi. Mix cayenne with garlic, lemon, ginger and honey to make a tea to help get over a cold or flu. You can vary this tea with or without the ginger or garlic, and just use a pinch of cayenne. If you have a slip of the knife while cooking, packing enough cayenne to cover well the exposed flesh will help stop the bleeding and is anti-microbial. (pinch in your tea, 2-5 drops tincture)

Cinnamon (bark) is an astringent, dispels gas, anti-bacterial, anti-microbial. It can also help relieve diarrhea. (tea 2 oz., tincture 5-10 drops)

Cloves are anesthetic and work well for toothaches (a drop of the oil or tincture on the offending tooth) and as a sore throat gargle. (tea 2oz., 10 drops tincture in water for gargle, do not swallow)

Fennel
(seed) is a wonderful warming plant to help ease flatulence, indigestion, colic and gastro-intestinal spasms. Fennel will also ease throat tension and coughs as well as bring up phlegm from the lungs. (tea 4-6oz., tincture 10-15 drops)

Garden sage (leaf) is cooling, disinfectant and astringent. It cools a fever, cleanses the blood, eases headache and nervous tension. It also stimulates digestion and is an emmenagogue. Garden sage also works well as a mouthwash for sore throat, mouth ulcers and bleeding gums. Garden sage is the variety of sage that you will commonly find in the grocery store. (tea 4-6oz., tincture 10-15 drops)

Garlic is excellent when you are sick. It stimulates your immune response, is anti-microbial and promotes sweating. It is useful when traveling to discourage parasites. Garlic also decreases cholesterol, LDLs, and blood pressure. Eat with parsley if having garlic breath bothers you, or a loved one. To enjoy the medicinal effects of garlic it important not to get it too hot. The best way to cook with it is to sprinkle it raw onto your food, or add it in at the end of cooking once the heat is turned off.

Ginger
is heating and increases circulation especially to the pelvic region. It is useful for nausea, motion sickness and to stimulate the appetite. Ginger makes a lovely footbath to warm you on a cold night. (tea 4-6oz., tincture 10-15 drops)

Nutmeg (seed) aids digestion, flatulence, diarrhea and nausea. It is a mild sedative in small doses and narcotic in large doses. It works well steeped in warm milk or brandy. (tea 2-3oz., tincture 5 drops)

Oregano (leaf) helps indigestion, coughs and headaches. It is an emagogue and is a good poultice for painful swelling. (tea 4-6oz., tincture 10-15 drops)

Peppermint
(leaf) is both cooling and stimulating. It helps cramps from gas, bloating, motion sickness and nausea. Peppermint can also soothe a headache by drinking the tea or putting a cool cloth soaked in tea across your forehead. (tea 4-6oz., tincture 10-15 drops)

Rosemary (leaf, flower) is warming, both a circulatory and liver tonic. It is a digestive aid and stimulates the liver as well as gastric juices. It is an emmenagogue and will soothe a headache. Rosemary is very antiseptic and makes a good wound soak. (tea 4-6oz., tincture 10-15 drops)

Tarragon
(leaf) stimulates the appetite, relieves flatulence and colic. It is also anti-fungal and anesthetic. (tea 4oz., tincture 10 drops)

Thyme (leaf) supports the stomach. It is also antiseptic (good as a wash for skin infections) and antispasmodic. It works well for congested lungs and shortness of breath. (tea 4-6oz., tincture 10-15 drops)

Turmeric (root) is warming, analgesic and astringent. It promotes bile, relieves a congested liver and gallstones and aids digestion. Turmeric also reduces tumors and uterine fibroids and is an emmenagogue. (tea 4-6oz., tincture 10-15 drops)

Many flowers are also edible and are beautiful additions to salads or desserts. These include borage, calendula, chive, lilac,violet and nasturtium.

Before you walk to you medicine cabinet, consider your spice rack.

How to make infusions, teas, decoctions,syrups, tinctures,oils ,salves and creams


As a continuation of the last post on herbs...

Infusion

An infusion is made by adding boiling water over herbs and allowing the mixture to steep for several minutes before straining and drinking. Do not bring the infusion to a boil with the herbs in the container. Rather, pour the hot water over the herbs into a separate container for infusing. Use about ½ to 1 cup of fresh herbs for 2 ½ cups of water. Chamomile, mint, ginger, lemon balm, rose hips, and sage are easy to grow herbs that make refreshing and healthful teas.

Herbal Teas

Making herbal teas may be the easiest of all herbal remedies. Also known as a tisane, or infusion, Herbal teas can be made by simply adding fresh or dried herbs to a pot, or cup of boiling water. To begin, place 1 teaspoon of dried herbs, or 2-3 teaspoons of fresh herbs, per I cup of water into a teapot or teacup. Add boiling water, cover, and steep for 10 minutes. You must then strain your tea by pouring it through a strainer of some sort. There are multiple ways of doing this, and your own experimentation will prove most valuable.

Herbal Decoctions

Similar to an infusion, or tea, a decoction is necessary when you are making remedies from tough plant materials, such as roots, bark, seeds or stems. To begin, place thinly chopped plant material into a saucepan and add cold water. Use 1-2 teaspoons of fresh or dried herbs to one cup of water. Bring the decoction to a boil, simmer for 15 minutes, and strain after the liquid has been reduced by one half.

Fomentation
Dip cloth in the infusion or decoction, wring it out, and apply locally

Herbal Syrup

Herbal syrups are a good way to soothe sore throats and common respiratory ailments. Herbal syrups can be made by combining sugar, honey, or glycerin with tinctures, teas, infusions, and medicinal liquors. Syrups can be preserved by adding glycerin or refrigerating. 1. To begin, make a tea, decoction, or tincture, or infusion. 2. Combine selected herbal solution, and combine with honey in a saucepan. Bring mixture to a boil. A typical syrup would have a ratio of approximately 1 cup of solution, to cup of honey or other sweetener. 3. Pour mixture into clean, dark bottles, let cool and cap with a cork stopper, or similar, non sealing lid. This will keep syrup from exploding if syrup begins to ferment. Keep refrigerated
.

Herbal Tincture
Herbal tinctures allow one to make a large herbal remedy and store for a longer period of time, making them available at a short notice to be used with teas, salves, creams, etc. to make an instant herbal remedy. Tinctures are made by steeping fresh or dried herbs in alcohol or vinegar. The liquid extracts the volatile oils and active constituents from the herbs, and preserves them for up to 2 years. Vodka is the best alcohol to use due to its tastelessness. 1. To begin, place cut up pieces of dried or fresh herbs in a large glass jar. 2. Cover herbs with enough alcohol or vinegar to fully immerse the herbs. Let steep at room temperature in a dark spot, shaking the jar daily. 3. After 2-4 weeks, strain the mixture through a fine cloth, paper coffee filter, or cheesecloth. 4. Pour the tincture into clean, dark bottles and store out of the sun until needed.

Infused Oils
Herbal oils are made by extracting the herbal constituents and volatile oils from the herbs for a later use. Any vegetable oil will do, yet olive, almond, canola, and sesame oils are the best. Herbal oils can be added to recipes, used for cooking, or massaged into sore body parts. Herbal oils can be infused by two methods; cold infusion and hot infusion. Cold Infused Oil 1. To begin, tightly fill a large sealable jar with selected herb flowers or leaves. 2. Cover herbs with selected oil and screw on lid. 3. Place jar on a sunny windowsill for approximately one month, shaking daily. 4. Strain the mixture into a container, and transfer into a dark bottle. 5. Place in a cool, dark place. Hot Infused Oil 1. To begin, place a ratio of 2 cups oil to 1 cup of dried herbs/ 2 cups fresh herbs, in a glass bowl over a pot of simmering water. 2. Slowly heat on low for approximately 3 hours, and strain into a bowl. 3. Transfer liquid into dark bottles, cap, and place in a cool, dark place.

Salves & Ointments
Salves and oils are made by combining heated oil with a particular herb until the oil absorbs the plants healing properties. Adding beeswax will thicken the mixture to the desired consistency. 1. To begin, pour 3-4 fl. Oz. Of desired infused oil into a glass bowl. 2. Place solution over a pot of boiling water. 3. Add a ?" square piece of beeswax to the solution, stirring constantly until the wax has completely melted. 4. Pour warm liquid into small dark ointment jars and store in a cool, dark place.

Creams

Creams are an emulsion of oil and a water soluble liquid, allowing the final product to be readily absorbed by the skin. The easiest way to make creams is to buy an emulsifying cream from the drugstore, and heat the desired herb plant material in it. 1. To begin, melt approximately 2 tablespoons of emulsifying cream in a bowl placed over a pot of boiling water. 2. Add one large tablespoon of dried herbs to the mixture, and stir slowly until the cream takes on the color of the herbs. 3. Remove from heat, strain, and squeeze the remaining liquid from the clump. 4. Let cream cool in a glass bowl, and spoon into small, dark bottles. 5. Store jars in a cool, dark place for up to one year.

Poultices
Poultices are used to apply moist heat to draw or soothe. Fresh leaves of the particular herb called for is bruised and steeped in boiling water (only enough to moisten) for a short time. The leaves are then spread between two pieces of cloth and applied as hot as possible, then, covered with a dry cloth to retain heat. A second poultice is prepared while the first one is still being used. It is to replace the first poultice the moment it begins to noticeably lose heat. The powdered herb of a plant may be substituted for the fresh leaves. Use enough of the powdered herb to make a paste. The paste is then spread between two pieces of cloth, applied and renewed, several times.