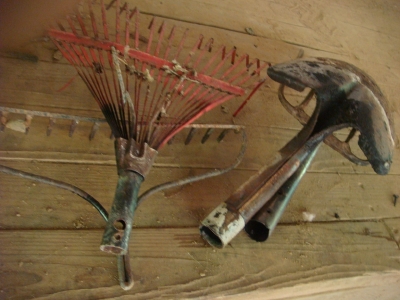
I realize there are 2700 ways and everyone says their way is what works when it comes to the storage and curing of tobacco. This is how we do it on a very small budget and while I will not say it is the best way, it does give us a nice smooth tobacco that didn't cost 500 bucks to set up. We have tried it a few different ways over the last few years and we finally think we got it figured out. Again, this is just our way, our experience and our story. What works for you may be a little different or a lot different depending on your situation.

Sure, hanging tobacco for a year or two is a good idea in theory. Unfortunately, for most of us, hanging anything for two years would create all sorts of issues with space, cob webs, wildlife and other nastiness that I would prefer not to have on my tobacco. For us, the issue is room, mold and critters. A good pack rat will hoard away a months worth of tobacco in a single night. And, quite frankly, I am not going to continue buying tobacco for a year or two while waiting for what I worked so hard to grow to cure and smoke.
Anywho, once the tobacco is hung to dry it will require a couple of months to turn to a uniform brown color. This is where some folks think it should sit for a couple years. We don't! Once it is dry we pick a morning where the humidity is high and the leaves are flexible and strip the veins from the leaves. We are not overly picky in this process and only work on the center vein, the others will chop up later on in the process. Once the veins are removed we just throw it in a box, any box, so long as the top can be closed to keep the dust off. That's it! It can be just that simple.


We have played with this method the last couple of years in an attempt to get a better flavor out of the tobacco. We have figured out that it cures and develops a nice flavor once it has been cut and then stored. For storage we like to recycle coffee cans as they seal in the flavors and aroma while keeping yucky stuff out. It makes storage much easier since they do not take up near the space and we also know exactly how much tobacco we have.
Since most of us do not have the money to spend a few hundred dollars on fancy schmancy tobacco choppers and I know we didn't and still don't, we also experiment with different ways of cutting the tobacco. The first year we simply threw it into the food processor. It works but is very difficult to get the shredded tobacco a uniform size. A couple seconds too long and you end up with a powder and a couple seconds too short and you have tobacco that's three inches long that is difficult to roll and near impossible to smoke.
What we have begun to do is make a roll of leaves and place it between two blocks of wood, then take a C clamp and close it down to make a small brick. Once compacted, release from the clamp, take a sharp knife and slice it thinly. I have not tried it but have read of people using old school paper cutters to cut it after making the bricks. From there, a quick whirl in the food processor or a small herb/ tobacco grinder will bring the tobacco to a usable size. There are a couple advantages to using the food processor. Larger amounts can be chopped at once and it is easy to add any flavorings(honey in a bit of everclear or vodka). It is a good way to evenly distribute it through the tobacco without making a mess of things.


Once the tobacco is cut and chopped to the size you wish, stuff it into coffee cans or other container and let it cure and develop the flavors. The longer it cures the better the flavor that develops. I would like to say that we have let some of our tobacco age a couple of years and then tried it, but we have not. We always need to use it within a few months time. Maybe one day we will get to the point that we have tobacco enough to store some for a year or two before trying.


 With the success of the hot tub hugulkultur bed we decided to try it out in a normal garden bed. For this experiment, we are using use an already established bed (of weeds) that we double dug when the manthing was laid off and we were on a bed building spree. This bed has not successfully grown anything (except weeds) since we dug it and began throwing amendments on it. It was also convenient because we had some piles of brush nearby, making our job (manthing's job) much easier.


 The process is pretty easy although it is a good work out if you don't have a mechanized earth moving contraption and live in mountainous terrain. This bed is about 14x5 and was a 2 (half day) job for one person. A young, in shape, person could probably do one in a day and live to tell of the experience. Us older folks have learned not to beat ourselves up when time is not of the essence so we tend to take things a little bit easier when we can.
  A few years ago we found ourselves with a hot tub that no longer functioned. Rather than hauling it off to the dump we decided to make a garden out of it. Because we were completely unemployed at the time, an economical way had to be found to use little soil yet fill the tub up so it could grow veggies. After some research, we decided to try an experiment with hugulkultur in a controlled environment. We filled that sucker up with brush, leaves, and dead wood, tossed a layer of compost over the top, then waited and waited and waited, all the while growing veggies in it. Our hope was that the experiment would be successful enough that we could use the hot tub to build soil that was good quality for adding to already established beds or for making new ones since true soil here is nonexistent.

 This spring when we began digging to see how things were going Lo and behold, everything had decomposed and we had three feet of beautiful,wormy, healthy, happy soil.
 I am currently in the process of moving the soil to where I need it and only saving enough of it to begin the process again. It worked well enough that we are now working on a couple actual beds using the same methods. It will be interesting to see how they turn out. Though hugulkultur is a great method of building soil it does have a couple of downfalls that I will post about in the next installment of our hugulkultur experiment.


 We have had a marble crate hanging around here for a couple years and after having a FAIL with it last season, I decided I was going to turn it into a raised bed. I decided our outdoor shower area was in need of a makeover to make it more appealing and make better use of the semi shaded area with a ready made trellis.
 vinegar
 mother
 My year of Seeds Of The Month has ended. Yes, I am an adult but everyone loves to have a package delivered and for a gardener, seeds are the ultimate gift. I have really enjoyed the SOTM and not just opening the pack to see what is inside but actually growing the veggies and herbs. All seeds are non-gmo, open pollinated, heirloom varieties that have been tested for a germination rate of 90% and higher. Everything I have received has grown and produced well for me even though I have used many for experimental purposes and treated them harshly. The cost of the seed club is very economical and well worth it, especially if one is able to catch a web special. For those new to gardening or for children, it is an excellent way to pique interest and give a gift that will give forever more. Overall, the seed club is very well worth the money and offers quite a nice variety of seed.
 Folks that have followed my ramblings for any length of time know that one of my hobbies is finding a suitable alternative to coffee. This time around, the adventure was using turnips. For hundreds of years turnips were animal fodder rather than people food but during the early 1900s in Germany, they became a staple food item. They were used as a coffee substitute, flour substitute and became a primary ingredient of many dishes including war bread.
 With the weird winter we are having this year, planning and planting of the gardens has been quite a challenge. We have had next to no winter weather and nice warm days with few cold nights which makes it very hard to hold back from planting early crops.
 We now have a super BIG work table in the project/living room. It measures about 4 foot wide by 8 foot long and is about 4 foot in height. This will give me plenty of room to sort seeds for saving, plenty of room for making stuff, and a great place for collecting clutter. It also fits in quite well with our other decor and was very budget friendly to build.
 To assemble, all he did was cut a few inches off of each of the pallets so that it wouldn't be quite so tall then attached a piece of plywood on the underside of the table top where the 2x8's stuck out to make hidey holes on the underside. We then brought it all in, stood the pallets up and slid the top over the pallet tops and attached. He then added a couple braces for support.
 It is the fall mushroom season and this is one of the finest that can be found. Commonly called chicken mushroom or chicken of the woods, Laetipous sulfureus can be used in any recipe that calls for chicken or in traditional mushroom dishes. Rather than rewrite what has been written many times before here is a link to read more on it. When we had a chicken the other night, I made an Argentinian recipe called pollo el verdeo with it. It was quite tasty and very easy to make.
 3 cups sliced mushroom or chicken
 Sure, hanging tobacco for a year or two is a good idea in theory. Unfortunately, for most of us, hanging anything for two years would create all sorts of issues with space, cob webs, wildlife and other nastiness that I would prefer not to have on my tobacco. For us, the issue is room, mold and critters. A good pack rat will hoard away a months worth of tobacco in a single night. And, quite frankly, I am not going to continue buying tobacco for a year or two while waiting for what I worked so hard to grow to cure and smoke.

 We have played with this method the last couple of years in an attempt to get a better flavor out of the tobacco. We have figured out that it cures and develops a nice flavor once it has been cut and then stored. For storage we like to recycle coffee cans as they seal in the flavors and aroma while keeping yucky stuff out. It makes storage much easier since they do not take up near the space and we also know exactly how much tobacco we have.


 Once the tobacco is cut and chopped to the size you wish, stuff it into coffee cans or other container and let it cure and develop the flavors. The longer it cures the better the flavor that develops. I would like to say that we have let some of our tobacco age a couple of years and then tried it, but we have not. We always need to use it within a few months time. Maybe one day we will get to the point that we have tobacco enough to store some for a year or two before trying.

