Showing posts with label food preservation. Show all posts

Tuesday, August 2, 2011

cucumber marmalade

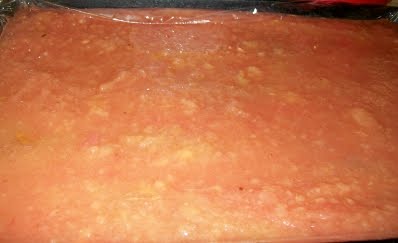
So I went a little bit overboard in the cucumber planting this spring and now find myself scrambling to figure out what to do with them all. While we love our pickles (post up coming) we only eat so many pickles in a year, besides, we are just now finishing off our pickles from two years ago so we do not need THAT many. In my search for cool cuke recipes I ran across one for cucumber cakes, breads, cookies (post upcoming), jams and marmalade. Since I do not have much time to mess about cooking for hours I decided to try the marmalade today and it is tasty! Beyond that it uses pulp in the recipe and since I have been on the agua fresca kick it is a good way to use some of the pulp in food products and not as a face mask. Granted, it does make a lovely face mask and all I am just not that kind of girl.

Someone saw my post about making this today and said it is delicious on fish. I also saw a recipe that suggested adding a couple of drops of green food coloring to the mix to make it prettier. I think it looks fine as is and didn't add any.

2 cups cucumber pulp (4-6 cukes)
4 cups sugar
1/3 cup lemon juice
2 tablespoons grated lemon rind
1 pack pectin or 1/2 of a 6 oz bottle of liquid pectin

Wash, trim ends, remove seeds and peel the cucumbers (I left the peel on).Throw the cucumber into a food processor until it is a pulp. Place two cups into a pan, add everything but the pectin and mix well. Bring to rolling boil, and boil 1 minute, stirring constantly. Remove pan from heat, and stir in pectin. Skim the foam off and put into jelly jars. Process 15 minutes in hot water bath.

Friday, July 29, 2011

leather britches

Leather britches or shucky beans are simply beans that are preserved through drying while still green and in the shell. Although we do not grow many beans because they are cheap to buy in bulk quantities, we do enjoy them on occasion. Rather than have them taking up shelf space, canning them or freezing them I generally use this method. It is simple to do and I like seeing them hang around the shack.

When beans are mature simply snip off the end of the pod where the stem was and run a string down through the center of the beans(feed bag strings work great for this) or simply lay them out in the sun to dry for a couple few weeks. Once dry, hang them anywhere that they will keep dry until you are ready to use them. If you lay them out in the sun, remember to bring them in during inclement weather. I typically hang ours up under the carport rafters and bring them in once the weather changes come fall.

To cook, just throw them in a pot of water overnight to soak, drain them in the morning and then slow cook all day long in water with a chunk of fat back, bacon, or a ham bone. Season to taste and serve.

Monday, July 11, 2011

canning over wood

For those that do not know, we are for the most part fossil fuel free on the homestead. The only fuel we use is for the weed eater, chain saw and coffee in the mornings because I am simply too lazy to go and make a fire at 5 am. This also means that all of our canning is done over wood and on days that we have to use the pressure canner it makes for some very long days. Yesterday it made for 13 hours of feeding fire and transferring jars into and out of the canner. It also made for someone having to collect the wood to cook over for all of that time.
I did not start the day out with plans of canning until near 11 pm but when I checked the curing potatoes I came to the conclusion that there was no way that they could be stored until eating and if we wanted any taters at all through the winter, I had no other choice. We will have to buy some local grown potatoes for fresh usage this year as this truly was the worst potato harvest EVER! So, we began chopping, slicing, and dicing and got a grand total of 27 quarts ready to go in the canner and then had the long wait to get them all finished. We will be getting a larger canner one day, this 5 quarts at a time business is just too slow for my liking.

Since we had the fire under the stove top going and had breaks when the canner was depressurizing, I also made rolls, tortillas, chocolate zucchini cake, lentil taco filling, cinnamon rolls, and blackberry jam which I boiled all over the stove top, made a big giant smelly mess and lost half the jam. I must say I am glad that it was outside as I could just let it burn off and self clean rather than having to dismantle a stove in the shack. I should have also slow roasted a roast but since I had not planned on canning all day long it was still frozen solid. Some of the things I slow cooked in the oven part of the stove even though there was no fire under it. I would have made many more items and fired up the oven to a proper temperature had I not had to finish up a paper for school and do an assignment that I had put off all week.
Canning over wood is not difficult and is not any more time consuming than canning over a flame on a normal stove. Regulating the temperatures does take a little bit of getting used to and it does require that a good stash of wood be at the ready. If I had another functioning canner I could have easily double or tripled the amount being canned at once and made the day much shorter. Water bath canning is much easier as I use a big wash tub and can put over 20 quarts in at a time. Thankfully most of what will be left for canning can be done using the water bath method rather than the pressure canner.

Monday, June 13, 2011

monday's mountain musings

Finally got our help down here yesterday after a rather long delay. No matter, as it is someone that has spent a lot of time here already, knows how we roll, is not afraid to work and has some excellent organizational skills so we can make up for lost time. Manthing had today off so we were able to get some more work done on the goat shed. The outside is now completely covered with the first layer and part of the inside is as well. We are running down the homeward stretch on it so soon we will move on to other projects.
We still have had no rain here, so again this weekend, we had to water all of the gardens. As soon we get accustomed and into a pattern of watering them all the rains will start again. Of this, I am near positive. Today I took a big wooden crate type thing and turned it into a potato planter. This one has no soil what so ever and it was the fastest garden we have ever built around here. I threw some seed taters in as an experiment to see how they grow through the summer in a fairly shaded spot. I also chucked in a couple other seeds just to see if they do anything. The gardens are really starting to take off now and there are blossoms everywhere. We are harvesting zucghini, summer squash, a few beans, carrots, onions, herbs and garlic. Within a week or so we should be eating our first tomatoes and cucumbers too.
Today I am dehydrating something more than herbs for the first time this season. I have about 7 pounds of carrots in and as soon as they are dry will have more to go. The carrots have done very well this spring. Maybe it's because of the tomato plants in with them and vice versa. The tomatoes are super healthy too and instead of stalks have tree trunks on them.

Tuesday, December 21, 2010

fruit leather

**the pics are from 3 separate batches of leather. apple butter leather**


I have been on a fruit leather making kick as of late. It is soooooooo easy to make and it is cleaning out the freezer a bit to make room for some meat to go in there. We were recently going to purchase a side of beef until I had a look see in the freezer and figured we could perhaps fit 20 pounds of meat in, certainly not enough space for half of a steer.

Making leather is a great way to use up some of the many fruits I have frozen that otherwise would likely be forgotten about until next summer when I need room for more fruit and veg. It is not that we do not like our fruit, I just forget about it because of the old, out of sight out of mind thing. The canned jellies, syrups, jams, pie filling and fruit are all on shelves so we use them regularly but the frozen stuff gets forgotten. The leathers will make a nice and healthy addition to the manthings lunches and a great snack to have around the house too.

We only have a solar dehydrator here, but I have learned over time that underneath the wood stove is a great place to put trays of fruits and veggies to dehydrate them in the winter. It does not get too warm but provides a nice steady supply of low heat that does a great job of drying and is as quick as a commercial made dehydrator and its free! Before trying this at home, check and see how warm it is under your stove, for all I know you may be able to roast a turkey under yours.
** thai golden and watermelon**

When I make the leathers, I use frozen fruit. I simply thaw and puree in a food processor or blender.The consistency I like, resembles a thick applesauce. If it is too thin I strain it through a strainer bag for a spell. I use no sweeteners in mine though some folks do. I then spread it on a plastic wrap lined cookie sheet to about 1/4 inch thick and place under the stove on bricks. I would not suggest using wax paper, mine stuck to the leather and was tough to get off. Within 24 hours or so I have a nice sheet of leather. I like to rip mine up like jerky and throw in a jar to just grab as needed. You can also roll the sheet either in the wrap or cut in sections, roll and then wrap. It is just a matter of preference. Ours are not meant for long term storage but they can be vacuum sealed and stored like any other product for long term.
**mixed berry with apple**

I have not tried any of these additions as yet but thought some of them were pretty neat ideas. I really like the idea of the whirled up squash in order to stretch the amount of fruits.
  • finely chop nuts to add to the fruit puree.
  • adult-flavored fruit leathers, small amounts of fruit brandy or liqueurs (or nut liqueurs) can be added to the puree.
  • unflavored (or vanilla) yogurt with a fruit puree.
  • add zuchinni 50/50 to the puree for increased yield. The squash picks up the flavor of the fruit while having no flavor of its own
  • leave bits and chunks of fruit in the puree
  • add spices to the puree to enhance flavor

Wednesday, August 11, 2010

around the homestead-braiding onions-sorta, kinda

No I have not disappeared, just been  busy, and  had a computer meltdown last week. Once I got that replaced on  Saturday I had  to play catch up with school work  and deal with all the hassle of setting up a new computer. Now I just need to get my pictures off the old computer so that I can do a garden update. I could just take more pictures now, but  things are starting to really  get sorry looking after over a month of next to no rain.

Anywho...

Wow, I had no clue how difficult it was  to braid  onions until today and after the  mess I made , I doubt I will ever attempt to braid them again!  I have never actually seen anyone braid them in person and was going by a couple of tutorials that I had run across online , needless to say I did not do a very good job of it and  after a while just started tying them on. I think I would have done a better job had I had a human here to show me the basics of it.

I think I will just put the  rest of them  in some spare mesh bags that I have around. It made my hands hurts and  the semi dry stalks tore my cuticles all up. Me complaining about something tearing my hands up is  BAD, as I have some of the ugliest fingers  I have ever seen a female have. They also make a really BIG mess while you  are braiding them up. Anyone that has a real house  would be better off doing them outside if you try this. I did it on the floor  inside  and this is the mess I had when i was done .

The tutorials I used  to guide me in my epic failure  are  here  and here.

Monday, July 19, 2010

around the homestead-chicken butcher day

Today was the day the chickens we purchased a couple few months back were butchered. We did 18 of them in about three hours with the three of us. Myself, the manthing and our partner in homesteading crimes got busy  and while the job aint never much fun, it went very smoothly with the exception of  a couple that went rolling on down the hill. This was the first time we have ever left the bird whole and not cut them down which is fine with me as it makes things much easier and quicker. We always skin rather than pluck so that also cuts the time down some. All in all for a job I don't like this was a great butcher day. If  all butchering days went like today did I probably wouldn't mind doing it  more often.
 I am including a couple links to sites that I find helpful  and that I know do a good  job  on tutorials for those that  have never butchered chickens before.  In this first link is Frugal  and although they use a cone to kill and also use a plucker the tutorial is very good. The second link is from Backwoods  Home  and is more like how we do our birds here at butchering time. A third good tutorial is  from the modern homestead  .

Saturday, July 17, 2010

tomatoes- canning

Yesterday while canning the peaches I was also able to begin canning a few tomatoes up. Since they are both water bath items  it made the process super easy as  they are basically the same when it comes to prep work and canning.  I only had 3 quarts of tomatoes to do  but it is three more quarts than I was able to do last year so I was happy. Hopefully this was the first of many tomato canning sessions.

Rather than  typing out something that is already written everywhere  and written  in a much better fashion than I can do, I will just give a couple links to the sources that I use when I need to  reference a manual.

 The first link has many ways to can tomatoes, from whole to juice and soups. http://www.extension.umn.edu/distribution/nutrition/dj1097.html

The second link is to a very well put together picture tutorial from start to finish. The site  has  tutorials on canning many other types of fruit and veggies too. 
http://www.pickyourown.org/canning_tomatoes.htm

Thursday, January 21, 2010

basement cold rooms

Way back in the days of old before the advent of modern grocery stores every home had a root cellar or something similar to store their crops in through the winter months. If they didnt have a good food supply put back then they were going to go hungry part of the year as there was not a grocery store on every corner. Even in the deep south cold storage areas are very important. Even though they cant normally keep the food at optimum storage temperatures, it will keep the food 20 or so degrees cooler than the out door temps therefore increasing the span of edibility.

In many places in modern times, digging an old time root cellar simply cant be done but there are alternative solutions that work just as well. In this thread we shall explore basement cold rooms or cellars. Most tutorials and plans for the basement cold rooms tend to be all about the same.

This first plan is from an ol feller on another board. Heis  a cantankerous grumpy bugger but he has some very nice tutorials on his site. Maneuvering the site however is an issue so I will post his words with a link to the pictures detailing what he did

Cold Room in Basement.
http://www.durgan.org/URL/?WVRGE 30 August 2009 Cold Room Construction

Cold room construction in the utility room in the basement. Purpose is for storing garden produce. Potatoes, carrots, brussels sprouts, beets, etc.

This is the cold room built in my basement. Space was at a premium so I did the the best with what was available.

The floor space is 18 square feet, and 80 inches in height. A four inch outside air vent was installed. The hole was cut with a rental tool. The one plug in the room is split and the light is switched from outside. Paneling was construction grade spruce 5/8 plywood. Insulation of the inside wall is R14, and a vapor barrier was installed on top of this insulation, then covered with5/8 plywood. The roof was insulated in the same manner.

Tables are plastic, the same as I use in my greenhouse. Vegetables will be stored in the common plastic milk containers. The air inlet will be controlled by stuffing a rag in the inlet if it get too cold. The exhaust went is four inches diameter, and is in the roof of the structure. Humidity will be controlled with a pan of water, if necessary.

Time to build about 48 man hours. Started 25 August and finished on 30 August 2009.Cost $565.42 I had some help for about 16 hours.


Here are the pics of how he organized it http://www.durgan.org/URL/?NKLSD

Keep Produce Fresh In Cold, Moist Air
If you live in an area where fall and winter temperatures remain near freezing and fluctuate very little, you can store root vegetables, apples, and pears in a wide variety of insulated structures and containers. These range from a simple mound in the garden to a full-fledged root cellar. In each case, the storage unit must maintain temperatures in the 30 degrees F to 40 degrees F range with humidity between 80 and 90 percent. The high moisture content of the air prevents shriveling due to loss of water by evaporation. An old-fashioned, unheated basement is an ideal spot for a root cellar, but a modern basement can be used if a northerly corner is available.
Different vegetables can be stored together in a single container, but fruits should never be stored with vegetables nor should different fruits be stored together.

An 8-foot by 10-foot root cellar will accommodate 60 bushels of produce. Indoor root cellars are the most convenient to use and easiest to build. Try to use a northeast or northwest corner of your basement that has at least one outside wall and id as far as possible from your oil burner or other heat source. One north-facing window is desirable for ventilation. The interior walls of the root cellar should be constructed of wood, and if the basement is heated, they should be insulated. The precise amount of insulation needed depends on the average basement temperature, but standard 4-inch-thick fiberglass batting with a foil or plastic vapor barrier should be more than adequate. Install the insulation with the barrier against the wood. Add an insulated door and fit the window with shades to block out light. To keep humidity high, spread 3 inches of gravel on the floor and sprinkle it occasionally with water. You can also maintain humidity by storing the produce in a closed container, such as a metal can lined with paper.

This text and picture were taken from a 1981 edition of a Reader's Digest book, Back To Basics.

Image

following are a few more links to basement cold cellars.
http://www.ehow.com/how_2085550_make-ba ... ellar.html

http://www.motherearthnews.com/Do-It-Yo ... ellar.aspx

simple in-ground or mound vegetable storage

There are several methods of in-ground veggie storage ranging in very simple to quite extravagant if there is such a thing in the root cellaring world.

One of the easiest methods is- At the end of the growing season, bend over the tops so that root energy will not continue to be sent to them. Do not cut the tops off as this will provide entry for bacteria and insects which may destroy the root before you come back for it. Cover the rows with a mulch of straw, hay, or cut weeds and long grass so that the ground is less likely to freeze.

The next easiest option is to make a simple dug out pit. Roots, tubers, and bulb vegetables require little effort to store. Some vegetables - including beets, carrots, parsnips, rutabagas, and turnips - Cover with a 1-2 foot (30-60 cm) layer of mulch such as straw or hay, which will trap air and won't become saturated with water, an easy way of storing vegetables. You can also use wood chips or leaves if you remove them before they decompose in the spring.

Here is a simple cone pit-A cone-shaped pit can be constructed to store small amounts of vegetables such as potatoes, carrots, beets turnips, salsify, parsnips, and cabbage Such structures can also be used for storing winter apples and pears.(fruit should not be stored with veg.)

Image


Another version of a dug out pit uses either a barrel baskets garbage cans and old tubs of some sort. The picture below pretty much explains how to make any of these . Simply modify as needed.

Image
Image

The upside of in-ground storage is that it's easy. The down side is Produce stored in this type of manner must all be removed once the pit is opened during cold weather, particularly when the soil is frozen. For this reason, it is better to construct several small pits rather than one large one. When constructing small pits, place a small quantity of several different vegetables in each pit. Then you need open only one pit to get a variety of vegetables. When several vegetables are stored in the same pit, separate them with straws or leaves.

Here is yet another method of a storage pit. Seems like an awful lot of work for what it is but neat none the less.

A storage mound is yet another simple storage method for crops. A storage mound is similar to the unlined pit but above ground. It is used where groundwater is a problem or where only a short storage period under mild temperatures is anticipated. The vegetables are piled on a layer of straw on top of the ground. The mound then is covered with a layer of straw that is held in place by a layer of soil. The mound usually contains one or two bushels of mixed roots, so when the mounds are removed, all the produce can be taken into the house.

Image

Wednesday, January 13, 2010

Thursday, November 19, 2009

the food supply

When it comes to food preps, storage and diet we are probably a little bit different than most folks are. Because we are trying for sustainability we have altered not only what we eat but the times of the year we eat it .

In order to minimize what we preserve for long term storage we have had to learn to eat what comes out of the garden and eat it when it does as much as possible. This has meant a huge change for my carnivorous self. I hated my veggies right up until we made the switch and now i can eat almost any of them, most of them happily although green beans are one thing I simply have not learned to eat.

Often times this means some really repetitive meals at certain times of the year. Of course creativity in cooking skills comes in handy so as not to get tired of having the same things. I have learned that there are at least 278 ways to fix zucchini and at least that many ways to fix potatoes.

Because we eat with the seasons in the garden and what comes out of the gardens some other things have changed as well. Lettuces and salads for us are primarily a winter and very early spring meal for us. Late fall is also when we indulge in salads here. Summer months many of our salad fixings simply do not do well. Potatoes and various dry beans are a staple here. One or the other is served at most every meal, We can get two good crops of taters in a year and I use drying beans and peas as filler crops all summer long so we always have a supply of them coming in from early spring until late fall.

We have also become primarily vegetarian. We do raise rabbits for meat since they are by far the most economical of farm critters we have found and we also raise a few hens and some goats. The goats are used for milk and product rather than meat and we sell off or trade the kids. We do always have a few on hoof if we have a hankering for goat but rarely slaughter. The chickens we use primarily for eggs and manure production.

We raise about half or a little more of the animal feed here on the land.This is our next big goal with the place is to raise that sustainability.With our terrain and minimal usable land it is a distant goal at this point. We may eventually choose to do away with the goats altogether but we do so like our fresh cheeses and such that for the time being we choose to keep them on.

The dogs are by far our largest expense here. Two well over 100 pound dogs can eat some food.


We do prep and stock pile some foods. Being from blizzard land it was just something i grew up with and we choose to continue to this day. It just sort of makes sense. We do not have hoards and hoards of cans and jars or secret rooms of stash boxes. Our preps we have on hand are simple and only cover the basic staples needed for survival for a fair amount of time. We instead depend more on the ability to grow the majority of our foods here on the land and we have learned to forage for a fair bit as well. We have worked foraged foods slowly into our diets over the last two years. We eat lots and lots of weeds in the spring, berries through the summer and acorns and other nuts are a staple in the kitchen. Kudzu is a fine plant contrary to what many think of it at this point in time and many many plants can be used in teas.

We garden 4 seasons of the year here , three of which are outdoors or in the greenhouse or cold frames, hoop houses etc. Winter time i set up a small growing area in the upper room of the shack. It has a wall of windows and keeps us in fresh greens, tomatoes and other herbs and veggies all winter long. I keep some plants going all winter and move them out side as quick as i am able too. We also use some permaculture growing practices and i do a bit of guerrilla gardening as well as just small random plantings in the general area. We save all our own seed and each year i try and buy a few new experimental types of seed. I also grow about 80 types of herbs either for culinary or medicinal use.

I also dehydrate and can quite a bit and we have a root cellar for storage of crops. We have a cool and/or hot smoker on the land and can preserve meat for long term

By doing things in the manner i described above, we are able to spend less than 20 dollars a week on all of our food and other needs. We generally spend an equal amount on preps and supplies we may need down the road while we can still afford to do so . For everything we need for a month here from gas, to chain saw oil, to canning lids and etc, etc we spend approximately 200- 250 a month. With all of our other monetary need we can live on 700 or so a month at this point. If we had to live on less we could simply cut the phone and power and cut it down to under 500 and be able to survive pretty comfortably and with minimal disruption..

Without knowing what lay ahead in the future we felt we needed to learn to live in a minimalistic manner before things got any worse. we wanted to ensure that we could cut back, live comfortably and yet keep far enough ahead of the game to be able to prepare for whatever may come down the path toward us. At this point the future is looking pretty grim when it comes to the economy and employment. It is very comforting as well as stress relieving to know that whatever may come atleast for the next couple years we are ok..

We have intentions of one day having a small produce stand along with herbs, medicinal lotions, soaps etc etc. Each year we thing we will have enough to be able to have a little road side stand unfortunately it hasnt played out that way as yet. Something always fails us and we need to make up for it in other crops to be able to sustain the life we live. I am sure that over time as we expand and continue the learning process great spirit will provide for us much as he has done up til now.